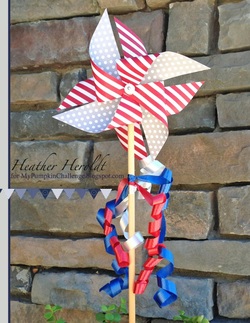
 The celebration continues all month long at My Pumpkin Challenge #0714 - Celebrate! This week, I thought I'd share how I would make my pinwheels actually SPIN, like this beauty that went in the planter by the front door - a DOUBLE pinwheel, lol! I began by fastening my pinwheels using an eyelet instead of a brad - that's half the battle right there! I made all my pre-punched holes a little bigger first, so the eyelet would fit. I actually started out by trying to laminate my pinwheels, since I knew I wanted to put them outside. Not much success here folks - the added weight of the laminate to the pinwheel paper was too much for my little craft eyelets, sigh. Maybe if you have longer shank eyelets this would work? Also, the laminate did NOT like bending - and even after rounding everything with the corner rounder punch, those little corners are SHARP! Yikes! Next, I drilled a tiny 1/16" hole through a dowel I had sitting around, that already had a wooden bead stuck on the end. I have no idea where I originally got these dowels, they look like they're for mini banners or something. But the bead gave a little extra to drill through, so the end of the dowel wouldn't fray or split. Then I made some beads with my Simply Pressed Clay - this is a perfect material for pinwheel making. I remember making pinwheels in preschool that we stuck through pencil erasers, and the Simply Pressed Clay reminds me of that. Make four beads, about dime size in diameter. No need to make holes in them yet, just let them dry solid. Next, snag one of our retired Hat Pins (remember those? I still have ALL of mine, except for one, lol) and string on a clay bead, then your pinwheel, another bead, through the dowel, another bead, the other pinwheel, and the last bead, that has a little dab of hot glue on it to keep everything in place. Don't make everything too tight - these babies need room to spin! Neat trick, huh? I ended up trimming my hat pin down a bit with wire snips, but I bet you could make bigger beads to take up all the room! Paper Pumpkin Pinwheel Party; plus, Simply Pressed Clay; Wooden Dowel with Wood Bead; Hat Pin (retired.)  Pumpkin Club July 26! Did you get your July Pumpkin kit, yet? Do they know what Blackberry Bliss fiends we are, or what?? I hope you can join us for our next Pumpkin Club, Saturday, July 26, 3 pm, chez Heroldt - RSVP to let me know you are coming! Club is free for my subscribers, and includes any extra supplies you might need, drinks and snacks! Let's take this Pumpkin out to play! You're going to LOVE our projects! Remember to subscribe here if you haven't already - sign up by Aug 10 and you can join us in time for next month! 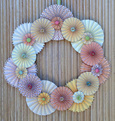 Summer School is Winding Down! I'm so glad everyone has enjoyed playing catch up with our summer classes! Class is now forming for our Rosette Wreath class! If you want in on what may be our last summer class, let me know and we'll get it scheduled! Class is $20, all supplies included, in a color scheme of your choice. Email today!
1 Comment
|
About MeWelcome to my blog! I'm a stay-at-home wife, mom and empty-nester, who, in addition to WAY too much volunteering, loves to create, whether it's in paper, fiber or in the kitchen! I live in sunny Scottsdale, AZ. 
July 13, 2 pm
Summer Fun Cards July 27, 2 pm Pumpkin Club August 17, 2 pm Snow in August 2024! August 31, 2 pm Pumpkin Club September 14, 2 pm Fall Cards 2024 September 28, 2 pm Pumpkin Club Don't forget to RSVP and bring a friend for a special gift! Categories
All
This content is the sole responsibility of Heather Heroldt as an independent Stampin' Up! demonstrator and the use of and content of the classes, services, or products offered here, on my DBWS, or any other Internet medium is not endorsed by Stampin' Up! All Stampin' Up! images used for my projects are copyrighted to Stampin' Up!, and used with permission under their Angel Policy.
Archives
July 2024
|

 RSS Feed

