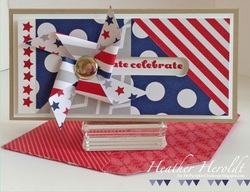
 Time for one last round of parties at My Pumpkin Challenge #0714 - Celebrate! So, I finally got around to that spinner card I promised back at our last Pumpkin Club - how could we have such an awesome pinwheel kit and not make them spin on a card?? I also decided to play with my card shape on this one - and use my envelope punch board to make a custom envelope for it - not that I'll ever mail this beauty, lol... This is definitely destined to join my seasonal hall table decor! Rather than go back over the basic directions for a spinner here, you can go to this link for a Christmas card class we did an age ago, that had a spinning ginger bread man, lol... But here are the extra notes for this card: My card base is 6" x 6", folded in half for a 3" x 6" finished base. For the pinwheel, I cut down the basic pinwheel shape by an inch on all sides, to make it small enough for a card. As it is, it still wants to hang over the card edge when it spins, but that's ok since you have to be holding it up to tilt it back and forth anyway, lol... After you adhere all your spinning apparatus, bend your pinwheel wings up slightly, so it has enough clearance to spin freely... Make sure to get your last Pumpkin Celebrations in - I can't wait to see your creations! Paper Pumpkin Pinwheel Party; plus, Crumb Cake & Whisper White CS; Real Red Ink; Word Window Punch; DSP Paper Stack in Real Red (retired, for envelope.)
0 Comments
Leave a Reply. |
About MeWelcome to my blog! I'm a stay-at-home wife, mom and empty-nester, who, in addition to WAY too much volunteering, loves to create, whether it's in paper, fiber or in the kitchen! I live in sunny Scottsdale, AZ. 
July 13, 2 pm
Summer Fun Cards July 27, 2 pm Pumpkin Club August 17, 2 pm Snow in August 2024! August 31, 2 pm Pumpkin Club September 14, 2 pm Fall Cards 2024 September 28, 2 pm Pumpkin Club Don't forget to RSVP and bring a friend for a special gift! Categories
All
This content is the sole responsibility of Heather Heroldt as an independent Stampin' Up! demonstrator and the use of and content of the classes, services, or products offered here, on my DBWS, or any other Internet medium is not endorsed by Stampin' Up! All Stampin' Up! images used for my projects are copyrighted to Stampin' Up!, and used with permission under their Angel Policy.
Archives
July 2024
|

 RSS Feed

