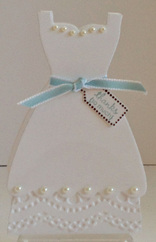
 Here's a cute bride's maid favor sample I worked up for my buddy Brenda - based on a picture on the cover of the March/April 2013 issue of Papercrafts magazine. So cute! There was a cutting template, but I thought it could totally be adapted to our own fabulous Dress Up framelits! Here's the how to: Cut out the dress of your choice, lining up the dress shoulders "on the fold" of a top folded piece of CS. Next, cut out a matching or coordinating oval (I used the #3 oval from our Ovals Collection to nest a little smaller than the bell of the skirt.) That oval is 3" in length, I cut it in half at 1.5" to give two pieces. 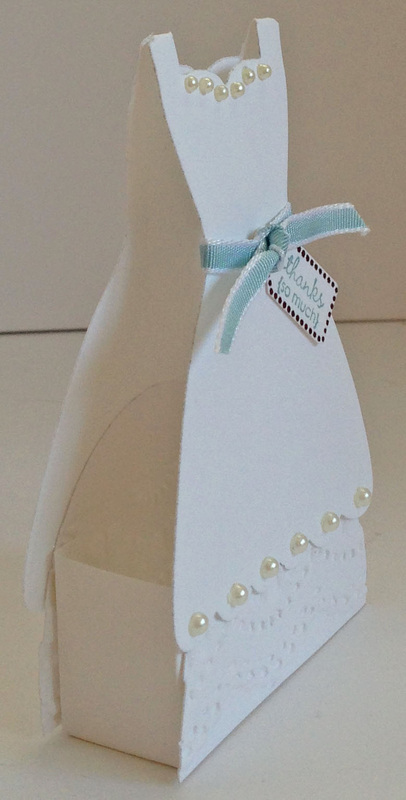 Decorate the two oval halves to show from under the outer skirt. I embossed mine with the Delicate Designs embossing folder. Glue the halves in place to show from under the dress skirt as shown, one on both the front and the back piece of the dress.
Next, to form the "box," cut a 4" by 1 1/4" (or you could make it wider to make the box a bit bigger) strip of matching or coordinating CS. Score that strip at 1/4" and 1" on the short edge, and at 1" and 3" on the long edge. Snip the 1" and 3" score lines back to the first crossing scoreline, so you can form the box angle, glue the box shape together, and then adhere to the dress backs as shown. I added a little ribbon at the waist, and some pearls to dress it up even more. The finished box could hold a little bag of mints or even a couple Ghiardeli chocolate squares. So quick and easy - really! Tiny Tags stamp set; Whisper White CS; Dress Up & Ovals Collection framelits; Delicate Designs embossing folder; Baja Breeze & Early Espresso inks; 1/8" Taffeta in Baja Breeze; Jewelry Tag punch; self-adhesive pearls.
2 Comments
Susan Levasseur
3/7/2013 02:03:32 am
Heather, this is super cute. I feel as CASE coming on. Thank you so much for sharing. Leave a Reply. |
 About MeWelcome to my blog! I'm a stay-at-home wife, mom and empty-nester, who, in addition to WAY too much volunteering, loves to create, whether it's in paper, fiber or in the kitchen! I live in sunny Scottsdale, AZ. 
July 13, 2 pm
Summer Fun Cards July 27, 2 pm Pumpkin Club August 17, 2 pm Snow in August 2024! August 31, 2 pm Pumpkin Club September 14, 2 pm Fall Cards 2024 September 28, 2 pm Pumpkin Club Don't forget to RSVP and bring a friend for a special gift! 


Categories
All


This content is the sole responsibility of Heather Heroldt as an independent Stampin' Up! demonstrator and the use of and content of the classes, services, or products offered here, on my DBWS, or any other Internet medium is not endorsed by Stampin' Up! All Stampin' Up! images used for my projects are copyrighted to Stampin' Up!, and used with permission under their Angel Policy.
Archives
July 2024
|
 RSS Feed
Proudly powered by Weebly